I've added more photography courses to my Udemy list, and it's helped me learn more by diversifying who I learn from. The Photography Masterclass has been helpful in making manual mode so easy that I haven't moved my camera dial away from manual ever since, but I didn't want to rely on one course. It's paid off since I've been picking up a lot of tips and tricks.


For example, when taking a backlit photo try to take the photo against a darker background to accentuate the light around the subject. Not a life changing tip, but something I probably wouldn't have paid much attention to.
I also started a few Lightroom and Photoshop courses, which forced me to finally open up and install the copy of Lightroom I bought years ago, but never got around to using. Today I learned about how to do selective color. I still remember when I bought my first point and shoot, I thought it was so cool to take black and white photos with one color highlighted, but it never worked since it would leave blotches of color in places I didn't want it. Using Lightroom is MUCH better.
Here are just a few first attempts:


This isn't something I will use very often, but it's just so easy and fun to play around with.
There are just two basic steps, everything else is just a matter of preference.
I'm assuming basic familiarity with Lightroom so I won't go into basics like importing a photo.
There are just two basic steps, everything else is just a matter of preference.
I'm assuming basic familiarity with Lightroom so I won't go into basics like importing a photo.
1. Desaturate all the colors except the one you want.

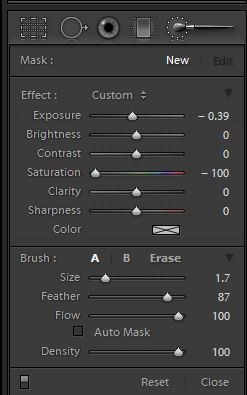
2. Most likely the color you want to keep show up in other areas that you would prefer to be black and white. For example, if you want a red shirt to stay red, when you take away saturation for everything but red, you'll notice the person's skin will show blotchy red color since our skin has red tones to it. The easiest way to get rid of any lingering color is to use the masking brush, bring the saturation down to zero and paint over the areas you want to be black and white.
It really is THAT easy!
I am really enjoying how simple Lightroom is for doing quick edits and streamlining the editing workflow, but I'll always have a soft spot for Photoshop. Here's a before and after photo from years ago in Salzburg. I'm still learning, but I was able to apply some of the techiniques I've been picking up to make a flat photo really pop. Yes, I added lipstick, I hate wearing lipstick, but I like the look.


Here is another example of what can be done better in Photoshop than Lightroom. Inspired by those fake vintage posters of monuments. It's the same red car from above turned green and with added texture.

I can't wait to learn more!
I am really enjoying how simple Lightroom is for doing quick edits and streamlining the editing workflow, but I'll always have a soft spot for Photoshop. Here's a before and after photo from years ago in Salzburg. I'm still learning, but I was able to apply some of the techiniques I've been picking up to make a flat photo really pop. Yes, I added lipstick, I hate wearing lipstick, but I like the look.


Here is another example of what can be done better in Photoshop than Lightroom. Inspired by those fake vintage posters of monuments. It's the same red car from above turned green and with added texture.


0 comments