T i f f a n y H s u

I admit, I've become addicted to learning about Photoshop.  I need to drag myself away from the photo manipulation tutorials since I honestly don't think I'll be using the majority of the functions I've been learning, but it is fascinating to learn that there are really very few limitations when it comes to what Photoshop and patience can do.

Today I felt inspired by Mary Poppins.  You know the scene when Mary and Bert jump into the paintings and you see them interacting with the painted objects? 

It's such a beautiful scene.  As a child I always thought it would be so cool to be able to be part of a painting. 

Since Photoshop works in layers I was able to isolate my two nieces in one layer, to preserve their images, and then turn the carousel into a painted object.    Luckily they are still young enough to be impressed by something like this.  

For the background I chose a watercolor filter with a plastic wrap filter layered on top of it. 

Here's the before.

I'm getting better at isolating foreground objects from their backgrounds, but I still have a long way to go.  There are definitely certain situations that are easier for that sort of separation, and others that are more challenging.  

It's a steep learning curve, but even learning the fun photo manipulation techniques have been  teaching me how to use tools I haven't encountered before.  Just like in all art forms, everything is about how to simulate light reflecting on a surface.

One more tool that I'm loving, but terrible with using, is the puppet warp tool.  Someday I'll figure it out, for now here's a quick trial.


Very cool stuff. 
I finished up the first course on Photoshop and now it's time to working backwards.  Since I started learning how to create certain effects first instead of learning about each individual tool, there are definitely holes in my knowledge, but that's easily remedied.  My next step is downloading premade Actions into Photoshop, not to actually use them, but to learn how other people utilize different tools.

For anyone who doesn't know what Actions in Photoshop are(that was me until yesterday), they are step by step functions that are saved as a way to make workflow more efficient.  So instead of performing a number of adjustments to a batch of photos one by one, you can use the premade Actions to perform each adjustment on the photos you want to adjust.  It works almost exactly like Macros in Excel.  

Based on one of the video tutorials for the Photography course I took on Udemy, I thought this type of automation was only possible in Lightroom, but with Actions it's just as easy in Photoshop.  

For example, I learned how to use gradients to create ethereal and vintage looks from running an Action someone else created.  I wasn't a fan of the results from the Action, but it did get me to spend a good portion of my Photoshop time playing with different variations of gradients.  As you can see below I was having fun cropping my niece into a field of flowers and using a rainbow gradient to hide the differences in color between the foreground and background photo.  The difference is still noticeable, but I know the more I learn and practice the better my results will be. 


Here's another example with the Taj Mahal photo I used before.  I added a rainbow gradient and then a little bit of motion blur to make this photo ready for a dream or a children's story. 

After a childhood raised on Lisa Frank, I had to hold back on just how opaque I made that rainbow.


It's been just over a month of taking courses online and I've learned a lot!  I went into this past month trying a bit of everything.  Not everything worked out, but overall I really enjoyed the majority of the courses I took.

I've discovered I'm really an auditory and visual learner.  Just reading about a topic doesn't have the same affect for me as watching a video.  For example, I've been wanting to learn more about the stock market for years.  I have previously invested my money into stocks and had some luck, but I never quite understood how to make better choices.  So I started with a very basic course to get an overview of the stock market, then advanced into technical trading, and I just bought a third course about options trading.  I haven't started the third course, but after the course on technical trading I have a better understanding about risk management (I think anyone interested in the stock market really should start with risk management), how to invest, how much to invest, when to invest, and when to sell.  Of course there is much more to learn, but being able use and read charting software has made learning about the stock market much less intimidating.

Another skill I've always wanted to learn is how to use Photoshop.  I decided on adding a free Photoshop course to my Udemy classes and was pleasantly surprised about how useful the course is.  I've been taking Photoshop & Lightroom For Beginners and I like that the instructor, Yanik Chauvin, has broken up the topics by the end result rather than go over what each tool does.  I had a separate course on Adobe Illustrator where the instructor just went over the tool panel, but that was nowhere near as effective as learning how to use the tools together while having an end result in mind.

That brings me to an observation.  I found the courses that taught tangible skills to be more interesting and useful than courses that focused on theory and idea.  I had a whole three and a half years in university that just went over theory, which is a great foundation to have, but now I'm much more interested in learning skills.

Another observation specifically related to choosing courses on Udemy is that a lot of the free courses are actually good, sometimes better than the paid courses.  I took two different logo making courses and I found the free course to be much more useful and relevant than the paid course.  This is also true of the high priced versus low priced courses.  The higher price doesn't indicate better quality, but rather those courses employ the marketing technique of creating more perceived value of their information by placing a higher cost.  The same goes for reviews of a course, I've noticed a lot of "friends" of some instructors create fake reviews, so as with any user generated review site, use your judgement.  Better yet, if the course offers a free preview, watch those videos to see if the course style, topics, and instructor make sense for you.  There have been courses I returned because I just couldn't get myself to pay attention to the instructor's teaching style.

Udemy had another $10 sale, which was a perfect opportunity to add more courses to my list.  It's really addicting learning new skills!
Now that my parents have more free time I've decided on taking them on at least one trip a year in an effort to get them to explore more.  Last year I used my wedding as an excuse to get them to travel around Europe and the Asian side of Turkey.  This year my dad has decided on a trip he's been wanting to take for as long as I can remember, Alaska!

I looked at the classic cruise option, but we quickly decided against it.  It would be more economical for us to take a cruise, but I get my DIY spirit from my parents, so it was no surprise that we all opted for traveling independently.

We decided on one week, in and out of Anchorage.  This way, if any of us decides we want to take a cruise in the future, the inside passage near Juneau will still be new to us.  

We're looking at end of July/beginning of August.  A quick search on some travel forums says planning a trip to Alaska one month prior to going is impossible, but I love a challenge.  

I'm still working out the details, but essentially we'll be using Anchorage as our base with a drive to Denali National Park, the Coastal Classic train to Seward, and a day cruise in Kenai National Park.

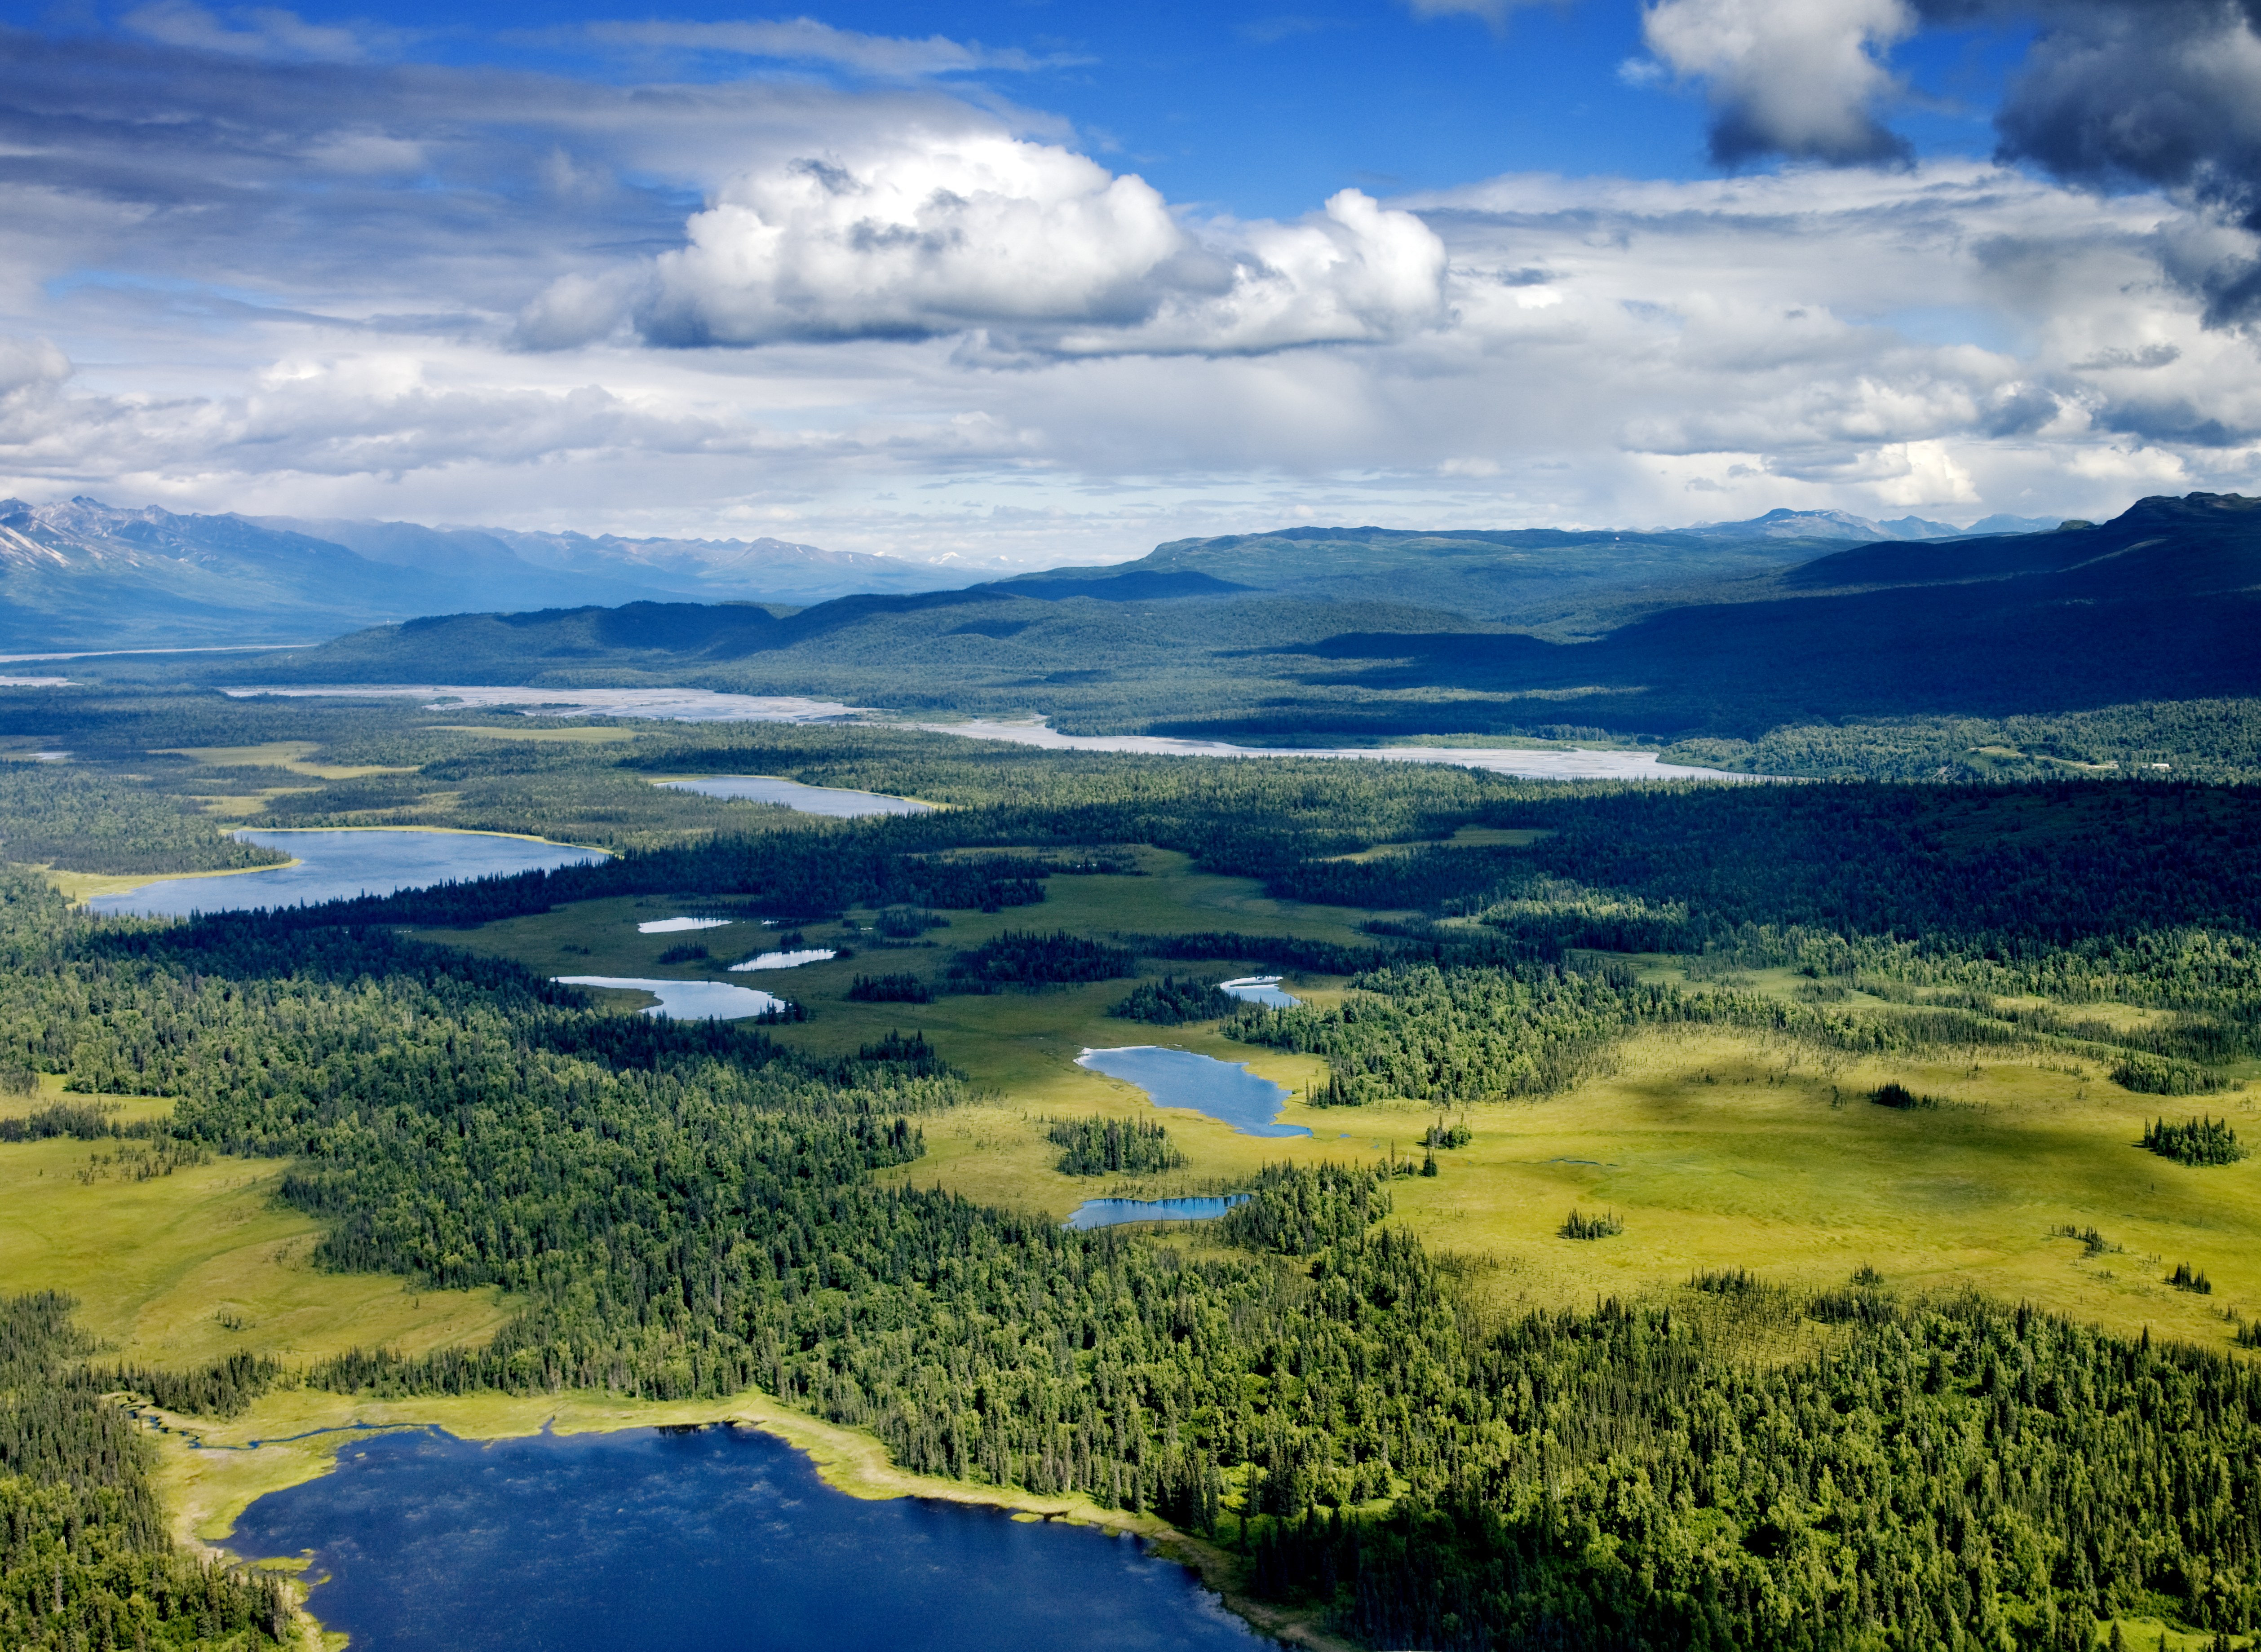
Denali National Park Via Wikipedia
I'll update once I have the itinerary figured out.  

I can't wait, even with all my travels, Alaska is still something unlike anywhere I've been before!


I am really having fun learning Photoshop.  The lessons I've been taking are really showing me how little I really knew about what Photoshop can do.  It really is true what is said about Photoshop, there is a steep learning curve, but once you start to learn, it becomes fun.

Here are two photos from my trip to Ireland's Cliffs of Moher from 2011.  The first photo is fine, but it could be a lot more fun. The second image is way under exposed, but the ray of sunlight coming from the clouds is beautiful.


I wanted to see if I could do something with the two photos, after seeing a tutorial on how to merge photos in Lightroom, I decided to give it a try in Photoshop since I am a bit more familiar with using layers.

Voila!


Not a bad first try, but I'm hoping to make it better as I learn and practice.  I don't think I'll be merging my photos often, but I love learning how it's done!  It's like when you learn how magicians do their tricks.

Here's another photo I did.  The before of the Taj Mahal lacks detail in the sky.  Adding a few clouds makes the photo more interesting -- almost like an HDR phoot


I've added more photography courses to my Udemy list, and it's helped me learn more by diversifying who I learn from.  The Photography Masterclass has been helpful in making manual mode so easy that I haven't moved my camera dial away from manual ever since, but I didn't want to rely on one course.  It's paid off since I've been picking up a lot of tips and tricks.

For example, when taking a backlit photo try to take the photo against a darker background to accentuate the light around the subject.  Not a life changing tip, but something I probably wouldn't have paid much attention to.  

I also started a few Lightroom and Photoshop courses, which forced me to finally open up and install the copy of Lightroom I bought years ago, but never got around to using.  Today I learned about how to do selective color.  I still remember when I bought my first point and shoot, I thought it was so cool to take black and white photos with one color highlighted, but it never worked since it would leave blotches of color in places I didn't want it.  Using Lightroom is MUCH better. 

Here are just a few first attempts:


Richard and Daniele are on the homestretch of their trip, out of Spain and in Belgium for a quick stop before Amsterdam.

I've been sending them tips for each stop and I've been surprised by two things.

One, Madrid is more interesting than I remembered.  True, I only spent two nights and an afternoon in Madrid before and after 8 days volunteering near Salamanca, so that contributed to my idea of Madrid as nothing special.  Although Barcelona gets more attention, it's getting so much tourist attention which has made Barcelona more expensive with more of a touristic feel.  I loved my visit in 2008, but there have been many changes.  However, Madrid has kept the spirit of a city.   Barcelona is fun for a visit, Madrid is somewhere you could live.

Two, Brussels is underrated.  I've heard that Brussels is not very interesting, but from what I've been reading it seems like a fun visit.  Daniele confirmed this.  Yes, the weather is temperamental, but the city itself is quirky.  For anyone who loves food and beer, Brussels is a paradise.  With a mix of French and Flemish, the food is more approachable than in Paris, and just as interesting.

The place they are staying is Place St. Gery, this was the historic center of Brussels, a tiny island that has now been converted into part of the mainland. Looking at it, you would never guess it was once detached from the rest of Brussels.

They took a day trip to Bruges and at my suggestion stopped by the Beer Wall.  From their half tipsy emails, I'm sure they enjoyed their beer flights.


Also in Bruges is Chocolate Line.  I've been craving the odd chocolate creations of Dominique Persoone ever since I read about them.  His notable creations include wasabi, tequila, curry, tobacco, sake, and fried onions.
Via Wikipedia
As for Brussels, there are so many places that there is no way their day and a half could cover it all.

Their first meal was at the highly recommended Le Fin De Siecle, a two minute walk from their apartment.  They loved the food even if they didn't get the carbonnade (typical Flemmish beef stew cooked with beer and mustard) or the ham thigh covered in mustard sauce.  But they will get their chance at their other food stops, Nuetnigenough (famed for their veal meatballs) and Het Goudblommeke in Papier (billed as the oldest pub in Brussels).

Via Wikipedia
The next recommendations are 100% touristic fun!

Poechenellekelder is a puppet themed bar next to Manneken Pis.   Yes, a bar full of those creepy puppets from your nightmares. 
Via Flickr

The other tourist stop is Delirium Cafe.  Pink elephants, 99% chance of being surrounded by only tourist, and the Guinness World Record holder for the most beers offered.  Yeah, that Delirium Cafe.
Via Wikipedia
For chocolates, the three brands I asked for are Leonidas (everyday type of pralines, great quality price ratio), Neuhaus (credited for creating pralines), and Marcolini (over the top expensive and creative works of art).  Earlier they stopped by the supermarket to pick up a few bars of chocolate before getting the pralines.  Even average Belgian chocolate beats out American chocolate any day.  While on a trip to Salzburg and Munich, we discovered supermarkets are great places to pick up chocolates without the hefty tourist mark up.  Some of my favorite chocolates were from a German grocery store packaged under their own generic brand.

For waffles, there are two styles, Brussels and Liege.  Brussels style waffles are lighter in texture and can usually be recognized by their square shape.  
Via Wikipedia
Liege waffles are more dense with crystallized sugar pieces inside the batter.They can be recognized by their uneven shape. I've only tried Liege style between the two, and I found the Liege waffles to be too sweet, but then again this was in Seattle and who knows how authentic it was!

Via Wikipedia
This is only a small amount of the yummy food to be had in Brussels.  I haven't even touched on frites or mueles!  

Who knew, so much delicious food existed in such a small area!  Belgium is now high on my "must visit" list, if for nothing else but to try this beer and get this glass!

Poirot!!!


It's been a week since I started a course on improving memory and speed reading. The course I selected for this purpose is Become a Superlearner: Learn Speed Reading & Advanced Memory.

The research and methodology is lead by Dr. Lev Goldentouch and Prof. Anna Goldentouch, the course is taught by Jonathan Levi.  From the start you can tell that Jonathan Levi is influenced by Tim Ferriss, which works for me since I am familiar with his work.  For anyone who isn't, Tim Ferriss came into the public eye with his book, The Four Hour Work Week, which goes over the idea of lifestyle design with a heavy emphasis on automation and life hacking via the pareto principle (80/20 rule).

 I've only gone through half the course, but I am taking a break from the videos.  This isn't because of a lack of interest, but each of the concepts takes a lot of practice and can't be rushed.  I haven't had time to practice, so I don't want to skip too far ahead in the videos without building the right foundation first. 

The first half of the course focuses on improving memory.  It doesn't matter how fast you can read if you can't remember it.  

The Superlearner course starts with a baseline test for reading speed and retention.  My baseline was 287 wpm with only a 64% retention rate, yikes!  After a week watching the videos, my reading speed has gone up to 390 wpm with 100% retention!  Since everything from the last week has focused on memory, I was surprised to see even my reading speed increased.  

Even though my retention has gone up, I know I'm not using 100% the strategies the course goes over.  Old habits are hard to break.  After each video I try out the methods taught, but after some time my head starts to hurt since some of the ideas are counter-intuitive to how I was taught to read.  It just goes to show that reteaching our minds is like working out muscles in the body.  It's not easy at first, but as you practice, momentum starts to build.  

The course focuses on using images as a way of  taking information from the working memory and storing it into our long term memory.  One of the first things the course goes over is making memorable images that are related in order to remember information in a text.  As you are reading, you create memory markers that connect and store information from the text. This doesn't come naturally for me.  

This is the stripped down version of what the first half of the course goes over.  There is more information that I'm not including, so if you are interested in speed reading, I recommend the course. So far I am enjoying it and I find the information to be useful. 

I'll end this entry with a video about the US memory champion, Nelson Dellis as motivation:


Two days turned into two weeks before receiving the results of my brain scan.

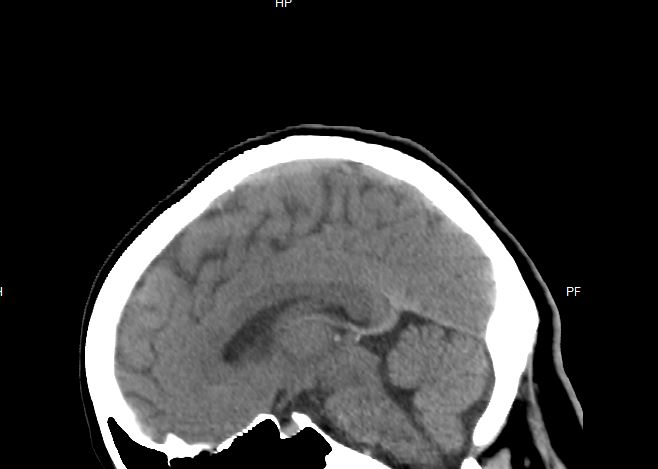
Basically the images show that there is nothing abnormal with my brain that could be the cause of my headaches.  Great.  I mean that as a word of relief and with a bit of sarcasm.  Of course having nothing wrong is always preferable, but that means still no leads reagarding what is causing my daily debilitating headaches.

On a side note, it is fascinating seeing my own brain.  When I first popped the CD into my laptop it took me a while to figure out how the program worked.  When I did, I couldn't stop playing with the layers.  Here are just a few screenshots.  I never realized how lumpy my head is under the massive amount of hair on my head.


Daniele and I have decided on our final honeymoon destination in India, but in order to make it work we will cutout the Golden Temple in Amritsar.  Even then our timing is still tight.

The reason we are willing to sacrifice one location and to make our trip more rushed is because our final decision is too amazing to not fit it into our trip.

Yes, ladies and gentlemen, I am talking about the North East of India, often referred to the Seven Sisters.  The Seven Sisters comprise of seven different states:

Arunachal Pradesh
Assam
Nagaland
Manipur
Tripura
Mizoram
Meghalaya

Via Wikipedia
The states are narrowly connected to the rest of India via West Bengal, giving them a feel of remoteness from the rest of India.  Surrounded by China, Myanmar, Bhutan, and Bangladesh, the seven states each have their own characteristics that resemble their borders.

After discovering how amazingly this part of India is, we were tempted to spend our whole two weeks going from state to state, but we couldn't bring ourselves to give up more of our choices. In the end we narrowed our choices down to two, Sikkim (not officially part of the Seven Sisters, but often associated with them) or Meghalaya.
Sikkim Via Wikipedia
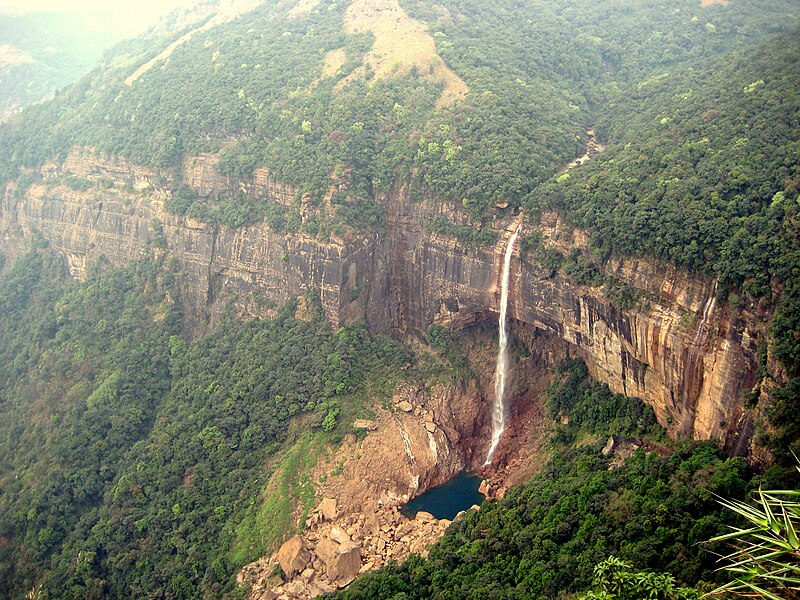
Meghalaya Via Wikipedia
They couldn't be more different from each other.

Sikkim reminds me of Tibet, a location I really enjoyed visiting.  With a large Tibetan population and the largest Tibetan monastery in India, it's no surprise there are similarities between the two.  

Meghalaya is different from anywhere Daniele and I have ever been to.  When I first saw pictures of Meghalaya it was the exact image of unexplored natural beauty that adventure films have placed into my head. 

As difficult as it was to decide, we were won over by the gorgeous living bridges of Meghalaya:
Via Wikipedia
The above is a living rubber tree root bridges created by Khasis tribe.  It wasn't just the bridges that helped us decide on Meghalaya, but the beauty of going someplace mostly unspoiled by tourism really was hard to resist.  Although not a lot of information can be found on Meghalaya through the usual channels, luckily there are a ton of Indian travel blogs that give detailed information.

Since there are no flights directly into Meghalaya, we are looking at flying into Guwahati or Jorhat, both are in neighboring Assam.  Jorhat might make more sense since we plan on going on a safari in Kaziranga National Park, also in Assam. 
Kaziranga National Park, Home To The One Horned Rhino, Via Wikipedia
There are really too many amazing places that we want to visit!  Even though we narrowed our options down to Meghalaya and a jaunt into Assam, it doesn't mean it was easy to say no to the rest of the seven sisters.  They are all truly gorgeous and each deserve a visit!
Daniele and I had the hardest time deciding between India and Egypt for our honeymoon, but in the end we chose India!  

That means 2 weeks in India and 1 week in our undisclosed location. We may need an alternate for that 1 week, which has us eyeing Sri Lanka or the Andaman and Nicobar Islands.

As for the 2 weeks in India, we're having a hard time narrowing down where we want to go.

We are choosing two different destinations each.  One monument that takes only a day to visit, and one location that takes longer to enjoy.  New Delhi will be our base, so we'll have pockets of time there.

My monument choice is the Golden Temple in Amritsar.  It will be a quick stop, and when I say quick, I mean quick.  All the flights we have seen have us arriving early morning in New Delhi from San Francisco, which lets us catch an early flight from New Delhi to Amritsar.  After a day trip, an overnight train.  Luckily this isn't my first time in India.  Not a lot of surprises regarding how to get around - flights, trains, private car, taxi, local buses, boats, motorcycles, I've done them all in India.
Via Wikipedia

If you read some of my other posts about online education I'm sure you've noticed that I really like taking classes on Udemy.  One of my favorite classes that I am currently taking is the Photography Masterclass: Your Complete Guide To Photography taught by Sam Shimizu-Jones and Phil Ebiner.

From taking a lot of beginner classes I'm realizing that in the past I tended to jump into a part of a topic that interests me while not really learning the fundamentals.  This has proven to be very limiting.  With photography I already knew how to manipulate some things to achieve what I wanted my photo to look like, but I still found shooting on full manual mode very daunting. I've read books, websites, photography magazines, but this is the first time the concepts and practical applications of how to utilize the skills has really sunk in.  I guess I'm more of an auditory learner than I had thought!

Sam and Phil have really put together a very easy to follow comprehensive course that covers the beginner basics and more advance topics.  Each video focuses on a different topic and shows the practical application of the concept.  The videos are very short, so you learn about the topic and then you are encouraged to go out and put the concept into use.

The very beginning of the course goes over how a camera works and the different types of cameras out there.  Nothing too intense, but good to watch just to get used to their teaching style.

For me, the real meat of the course is in the 3rd section which focuses on dropping auto and learning manual.  The absolute best takeaway from that section is their video and diagram of the exposure triangle.  I always wondered how to evaluate whether to adjust ISO, Aperture, or Shutter Speed, honestly, not being sure how to balance them is the main reason I stayed away from using full manual.  I have seen the three represented together as part of the exposure triangle in the past, but I don't know why it didn't click until now.

The main takeaway is to remember that even though all three help determine how much light reaches the camera's sensor, they each control a different aspect of the final photograph.  The below are pretty basic, but for me it was a good reminder of what to be thinking about when deciding what to adjust.

The ISO will determine how grainy the picture is, the higher the number, the more light and the more grain.

How you set the Shutter Speed determines whether or not your image will be sharp or include motion blur.

The Aperture controls the depth of field, the wider open the aperture (smaller number) gives more of a shallow depth of field while a deeper focus is achieved as aperture becomes more closed(larger number).

For a beginner getting used to shooting in manual mode, when evaluating a shooting situation, determine what kind of look you want for you images and adjust two of the settings to what you think should achieve that look, then as you are shooting, adjust the third to gain the correct exposure.  For example, if I am shooting outdoors in the sunlight, I may determine an ISO of 200 works for the situation.  I know I want to isolate my subject and decrease my aperture to 1.7.  Then as I am shooting, I would adjust my shutter speed to make sure I have the correct exposure.

The second bit of knowledge that I gained from that section is how to utilize the camera's light meter to determine if the chosen settings will over expose or under expose the photograph.  I know this makes me sound like a complete photography incompetent when I say this, but just those two parts of the class have really completely changed how I see manual mode.  I actually now prefer it to any other mode on my camera!

Just that bit I wrote above has taken manual mode from something complicated and scary to something enjoyable.  As with everything, knowing the basics isn't enough, but practicing the technique builds skill.

Below are just a few shots I've taken trying to get correct exposure.  I'm already seeing a difference in how I can change the look of the photograph based on how I change the settings.

Just for reference, these photos are taken with the Panasonic GF7 with the Lumix 45-150mm f/4-5.6 lens.


I find taking some of the free courses on Udemy to be fun diversions.  Without committing too much time, you can take a short free course on topics you might not have considered learning about.  Best case scenario, the course is helpful and introduces you to a topic you find out you enjoy, worse case scenario, you spend half an hour on a topic that you discover you really don't like.  Most likely scenario, you learn something new or reinforce what you already know.  Most of the free courses are pretty short and focus on a handful of concepts along with a few applicable ideas.  The most recent one I watched was Simon Jack's "Skool Of Creativity: Essentials".

The videos total at just over twenty minutes with a few text assignments.  The idea behind the course is to help viewers think more creatively with an emphasis on using that creativity to design solutions.

From the exercises, one that I find myself using from time to time is choosing an object and then think of 10 uses for it.  The uses can be practical or silly.  For example, a fork.  It can be used to eat with, it can be used as a name card holder, it can be used instead of a rake in a miniature garden, etc...  There are a few other steps in the exercise, but I won't give those away.  I've found doing this exercise on a regular basis helps prime my mind into thinking of different possibilities, which makes it less rigid in thinking.

Another concept Simon talks about is redefining a problem to find new and different approaches.  Sometimes it is the way a problem is defined that is what keeps someone stuck, but when you reword the problem it helps to come up with new ideas.  The example he gives is an executive asking his workers what he can do to make them more productive.  When the executive reworded it as, "what can I do to make your work easier" there was more of a response from the workers than from the original question.

One final idea that I really liked is to take the perspective of someone else.  Choose a character or a real person and try to think how they would approach a situation based on their background, way of thinking, behavior, etc...  This gives you a new way of looking at a problem that can be different from your default approach.

There are other ideas Simon talks about, which makes the videos well worth watching.  I'm actually leaving it on my dashboard to refer back to sometimes when I need a reminder of how to think more creatively.  
In the spirit of learning new skills and increasing my knowledge about things I've always been curious about, here's a great video about learning.  Josh Kaufman has found that in order to learn a subject, going from no knowledge on a subject to being competent takes about 20 hours.  That is equal to roughly 45 minutes a day for 1 month with a few days to spare.  That's a pretty grounded idea that when learning new skills, give it a month with focused learning 45 minutes a day to get to the point where you feel like you know what you are doing well.  Not expert level, but well.  That's pretty cool.  It's similar to the idea that it takes 3 weeks to make something a habit, I'm sure there is research that shows why the similarity between the two ideas.

Of course as with learning any skill, just spending time doesn't make it effective learning.  It takes deliberate use of that time that really counts. See the rest of what Josh mentions below in his TedxTalk.

I've been in a learning kick lately, so I've challenged myself to sit down and learn some of the skills I've always meant to learn.  I took a few online courses for fun a few years back, but never really got into them, probably because at the time the courses were limited to a lot of introductory courses or very coding/programming specific.  But now online courses have really grown and I'm finding sitting down and watching these videos actually helps me learn much better than doing it all on my own.

First a few resources:

Coursera: Probably the most widely used and comprehensive MOOC (Massive Open Online Course) list of classes offered by various institutions of higher learning.  The classes are free to audit, with the option to pay for a certificate of achievement for completing the lectures and any assignments/tests associated with the course.

Class Central  and Mooc List: Both are aggregates that compile different courses from various websites.

MIT OpenCourseware:  Access to hundreds of MIT courses in a number of disciplines.

Udacity: This one is tech industry specific, offering what they call "nanodegrees"  or credentials for different programming languages and other skills tech employers are looking for.  Many of the nanodegrees are sponsored by various companies with collaboration from other companies.  So you may find a course created by Microsoft with collaboration from AT&T.

Udemy: Similar to Udacity, the courses in Udemy are more skills based rather than theory based.  Anyone can be an instructor, so they are effectively crowd-sourcing education.  This is probably my favorite for learning a new skill or delving deeper into a subject not normally covered in university courses.  The fact that anyone can be an instructor might put some people off, but since courses are reviewed by those who have taken the course gives instructors incentive to make their courses better, more helpful, and even entertaining.  The cost of courses range from free to a few hundred dollars, but I've noticed Udemy has promos all the time, which can make a course priced at $299 end up being only $10.  If cost is prohibitory, wait for these promos and then stock up on courses.  Once you have purchased the course they usually give you lifetime access to the material so there is no time limit.

One of the first courses I would recommend for anyone starting out is "Learning How To Learn" via Coursera and offered by the University of California, San Diego.  Barbara Oakley is the lead instructor and she's very interesting to learn from.  Her style is not dull or dry, but rather engaging. The course does skim some of the concepts of how our brain functions, but it mainly focuses on skills we can use to become better learners.  It's been some time since I graduated from university and having a quick reminder course about learning has really helped put me back into a learning mind-frame.

Some of the coures I'm currently taking include photography, photo editing, writing, and speed reading.  One of the tips from Barbara Oakley's course regarding learning is to try and recall what you have learned and also teach others, so I'm going to try and go over what I learn in subsequent posts.


Not My Brain, Visa Wikipedia
Last Friday I went in for a CT scan of my brain.  The headaches are back in full force so my doctor and I agreed that getting a CT was probably the best next step.  I was able to schedule the CT scan right away, and I probably spent a total of ten minutes at the imaging center I went to.  This was my second time getting a CT scan, the first was for my ankle, back in 2010, so there weren't any surprises.  Afterwards I did feel a little woozy.  I guess having x-rays scanning my brain does have an effect. ;)

Results should be in this week.  I'm actually kind of excited to see a scan of my brain.  Of course it won't be as detailed as an MRI would be, but still interesting.  I'll update once my doctor has results.
The Amalfi Coast is probably one of the first places I fell in love with.

I had planned my wedding for Positano, before opting for a castle wedding in Umbria instead, but part of me still feels a little sad for moving the wedding.  In the end it worked out for the best since the week we were to rent a villa ended up being a week of rain versus just the one day of rain (on my wedding day) in our castle in Umbria, but like I said, it still makes me a little sad.  By the way, as just a quick note for anyone who wants to have a wedding in Positano, it is beyond possible to have a wedding on a budget there without really sacrificing anything.  With what we had planned, a week of activities including the actual wedding, housing for all our guests, and food for the week, it all would have cost less than a one day wedding in California.

But this post isn't about weddings.

I know, we've been putting off our honeymoon for one reason or another, but Daniele and I have decided we'll finally take our honeymoon at the end of this year or beginning of next year.

We've already selected one portion of our trip (hopefully political situations improve and entry points reopen, I'm keeping our destination secret for now), but we are having a hard time deciding between two options for the second half of our trip.  We've narrowed it down to Egypt or India, but the reason we are having a hard time deciding between the two is 1) they are two of my favorite countries and Daniele has an interest in visiting both 2) our first choice only allows Americans to enter with an organized group, and it'll only be half a year after our honeymoon that I'll have my Italian passport which allows for tour free visits to Iran.

We'll have a total of three weeks, one week will be reserved for the secret destination and two weeks for India or Egypt.
Our Secret Location, But It's Not The White Sand Beaches That Make This Place Unique

For my birthday over the weekend Daniele took me to the Village Pub in Woodside. Their menu is simple and seasonal, which for spring included a lot of fava beans and kale.  When we saw that, Daniele and I actually burst out laughing since I've been having endless amounts of kale and fava from our garden.  I mean seriously,  I've been having kale and fava everyday for just about every meal.

Both vegetables grow in such abundance in the Bay Area that I've ended up with more than I can eat! I've seriously been trying to come up with different ways to prepare them.


For the kale I usually add it to my morning green smoothie, but I also have been using my dehydrator to make kale chips covered in truffle spray Daniele's parents sent us as part of a care package over Christmas.  Those things are really addicting!

For today I've made a simple chopped kale salad with smoked salmon and walnuts, and a salad dressing combining dijon mustard, honey, lemon.  I used to think massaging kale was weird, but I gave it a try and it really does make a HUGE difference.  A quick 5 second massage with a little bit of olive oil really does make the kale easier to eat.

Chopped Kale
Smoked Salmon And Walnut Kale Salad With Homemade Honey Dijon Dressing And Cline Old Vine Zin

For a BBQ we had earlier this week I decided it was time to try something different with fava beans.  I've been having them sauteed with some salt and sugar, but that's best for the really tender ones.  As they mature the fava texture becomes more dry and powdery, which I really don't like.  I figured the texture of mature fava beans is similar to garbanzo beans so a hummus like dip made perfect sense.
Fresh Picked Fava Pods

Fava Beans Without The Outer Shell

After Boiling In Hot Water For 5 Minutes And The Secondary Shell Removed

After Blending In a Food Processor With Lemon Juice, Chopped Garlic, Olive Oil, And Goat Cheese
The dip turned out pretty well.  It looked really similar to guacamole, but had a fresh green taste of fava.  We used this on top of some pork loin that we had smoked and also with tortilla chips, in the end it was decided that this would be added to our rotation until the season is over.

Next time I'll combine kale and fava beans sauteed with sausage and fried gnocchi.  Just need to find the time to make fresh gnocchi!

I've taken a Bosphorus cruise with Sehir Hatlari (an alternate company that runs a similar route is IDO) in Istanbul twice now, and it is definitely one of those recommended activities for Istanbul that really shouldn't be missed.  For 25 TL(with current exchange rates that's just under $10 USD) you can partake in a round trip cruise, 15 TL for one way, 12 TL for a shorter round trip cruise, etc....
Via Sehir Hatlari

  • Older posts →
  • ← Newer Posts

Welcome to my personal blog!
I post about things I want to remember, if it helps someone
else along the way, all the better.

Translate

Labels
  • Travel ( 77 )
  • My Life ( 45 )
  • Photos ( 39 )
  • Photography ( 18 )
  • China ( 14 )
  • Education ( 13 )
  • Writing ( 13 )
  • Italy ( 12 )
  • India ( 10 )
  • destination wedding ( 10 )
  • Food ( 9 )
  • nieces ( 9 )
  • Spain ( 7 )
  • Asiana Airlines ( 4 )
  • Language ( 4 )
  • Travel Gear ( 4 )
  • United States ( 4 )
  • Ireland ( 3 )
  • Korea ( 3 )
  • Nepal ( 3 )
  • Egypt ( 2 )
  • France ( 2 )
  • Greece ( 2 )
  • Mexico ( 1 )
  • Netherlands ( 1 )

Blog Archive

Popular Posts

  • Like Father Like Daughter
  • Budget List
    My home reconstructing feels like it is forever ongoing, but I know it's really only been almost a month.  This past week we were given...
  • Eating In Rome
    My first time in Rome I was not very impressed with food there, especially after hearing about how amazing Italian food is.  It wasn't ...
Created by ThemeXpose . All Rights Reserved.